Learning Target
1. Make a character move left, right, and jump in Scratch.
2. Connect the makey makey to the scratch code.
Success Criteria
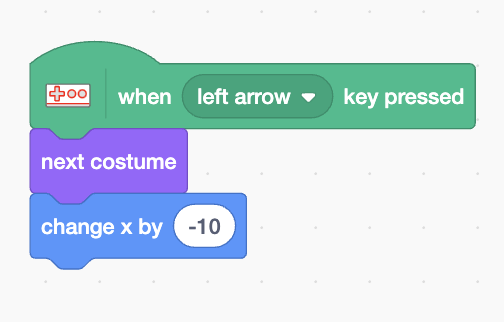
- Sprite moves left (
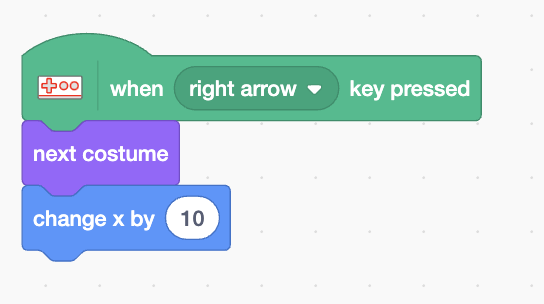
change x by
                                        -10
) - Sprite moves right (
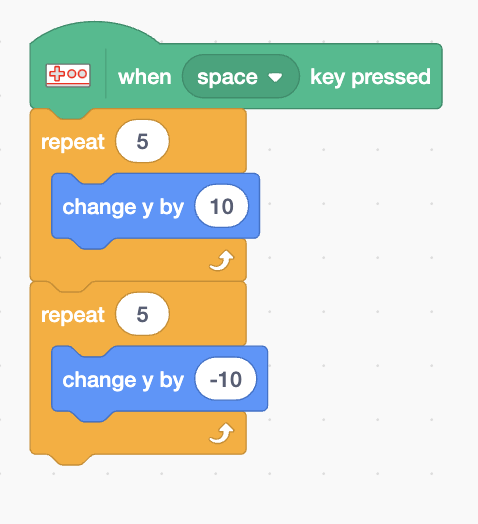
change x by
                                        10
) - Sprite jumps (repeat up / repeat down)
Materials
- Scratch
- Makey Makey + Controller

How Scratch Movement Works
- Left/Right: change
x. Right is positive; left is negative. - Up/Down: change
y. Up is positive; down is negative. - Jump: increase
ya few times, then decrease to land.
Types of Basic Movements
- Keyboard Inputs: Use key presses to move the character.
- Computer Controlled: Move the character automatically.
- Mouse Inputs: Move the character with the mouse.
Today we will focus on Keyboard Inputs
Step 0: Open Scratch
- Open Scratch
- Create a new project
- Create a new sprite
- Save the project
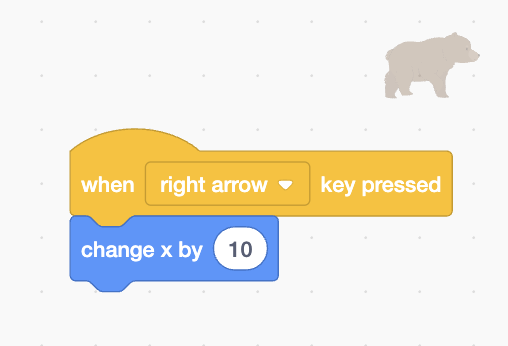
Step 1: Make Character Move to the Right
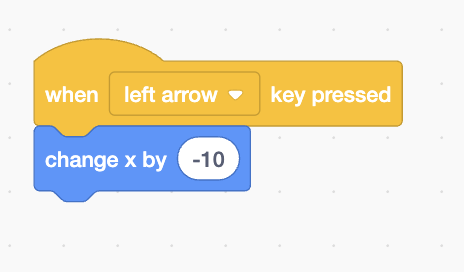
Step 2: Make Character Move to the Left
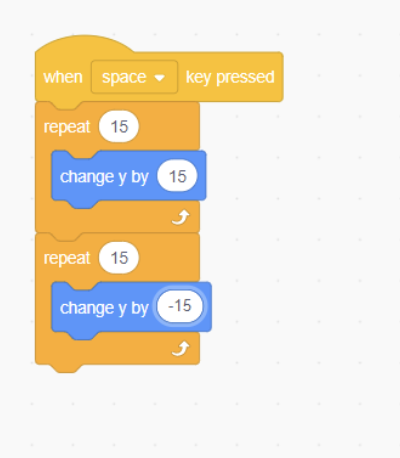
Step 3: Make Character Jump Up
Step 4: Make Character Jump Down
Now we will connect the makey makey to the scratch code.
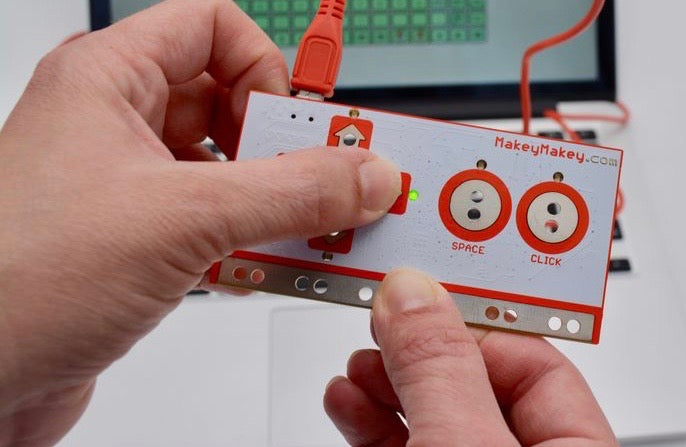
Makey Makey Setup
- Connect via USB to your computer
- Connect ←, →, and SPACE to makey makey code labeled LEFT / RIGHT / JUMP.
- Touch pads to control the same Scratch code.
Makey Makey Code
when [left pad v] pressed
  change x by (-10)
Makey Makey Code for Right
when [right pad v] pressed
  change x by (10)
Makey Makey Code for Jump
when [space pad v] pressed
  change y by (5)
  repeat (10)
  change y by (-5)
Review
What is the Makey Make code compare with the keyboard code?
- What does the X do? What does the Y do?
- How is the Makey Makey code different from the keyboard code?
- How is the Makey Makey code the same as the keyboard code?
- What is the difference between the left and right code?
- What is the difference between the jump up and jump down code?
Extra Challenges
- Add gravity to the code.
- Add a color change to the code.
- Create 2 characters that can move and jump.
- Add a jump count using variables
Explore Further using other projects
⭐ See Student Movement Games!
Check out amazing movement games created by students who completed this lesson! Get inspired and see what's possible.
💡 Want to share your movement game? Submit your project using our submission form and it could be featured on the student work page!
🧠 Concepts to Remember (For Later)
Optional extra reading. Skim the bold parts.
Big idea: There are 3 common ways to control a character in Scratch.
1) ⌨️ Keyboard Inputs
Use when: the player should control the character.
- Left /
Right: change
x - Up / Down:
change
y - Turn: turn degrees (smaller = smoother)
Quick recipe:
- Events: when green flag clicked
- Control: forever
- Control: if <key pressed?> then
- Motion: change x/y or turn
Show example
when green flag clicked
forever
  if <key (right arrow) pressed?> then
    change x by (10)
  end
end
2) 🤖 Computer Controlled (Automatic)
Use when: you want movement without a player controlling it (like an enemy).
Quick recipe:
- when green flag clicked
- forever
- glide (1) secs to x: (pick random) y: (pick random)
Speed tip
- Faster: smaller glide time (0.1–0.9)
- Slower: bigger glide time (2–5)
3) 🖱️ Mouse Inputs
Use when: the character should follow your mouse.
Quick recipe:
- when green flag clicked
- forever
- go to x: (mouse x) y: (mouse y) or glide (0.1) secs to x/y
Tip for smooth control
Use a tiny glide (0.1) to make it smooth but still fast.